If you need some painting ideas for your next artwork, I got you covered!
Do you have a friend that as soon as they see your drawing, they asks “how are you going to paint it?”
Maybe it’s not a friend. Perhaps it’s your mother, father or sister.
I do. Every time I draw something, my father comes to me and asks that question. EVERY TIME!
Sometimes I already know how I want the piece to look like. Other times I just go with the flow and decide it along the way. In any case, there are 3 simple watercolor painting ideas that could leave your friend speechless.
1. POSITIVE-NEGATIVE METHOD
This is the most common way to paint an Islamic geometric pattern.
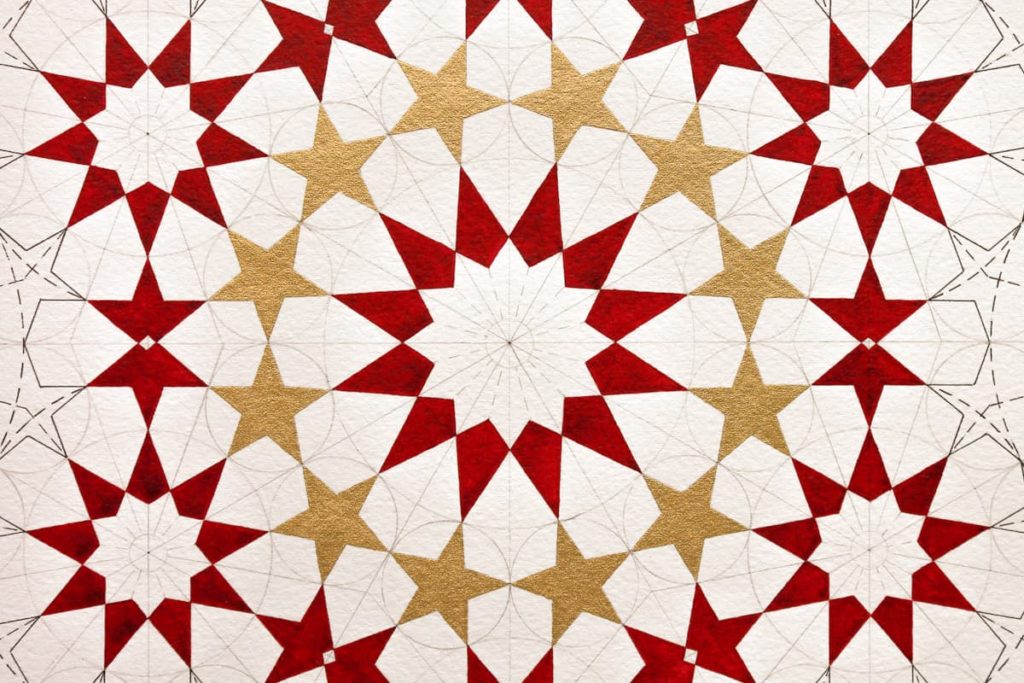
Create a sort of positive-negative effect by colouring some shapes and leaving other shapes plain.
I usually start with the stars which, most of the time, I paint in gold. The star is the centre of your rosette in a zellige design. If there are no stars in your drawing, start with the main shape.
Paint one shape and leave the shapes around it white. Then colour the shapes next to the white shapes. In this way, you will have a balance between the coloured shapes and the white of the paper. You can also do the opposite. Leave the stars plain and colour the kites.
This method is called the positive-negative method. Usually, the central star and the petals are considered positive shapes, while the kites around the central star and saft shapes are considered negatives.
You can see an example of positive-negative effect in this blog’s picture here above.
2. WEAVING
This method is the best looking one, in my opinion, but also the longest to paint.
Create a weaving around the shapes or simply draw the channels. In this case, you can paint all the shapes and leave the channels white.
You can also paint the weaving in a light colour and use contrasting colours for the shapes, or you can even colour the channels and leave the shapes plain. You choose.
To learn how to create the channels and how to weave them, I’ve created a video tutorial that you can watch here.
3. WHITE SPACING
This is similar to weaving, but instead of drawing the channels just leave some white space between the shapes. A thin white line is enough.
No need to be extra neat here so if you have a steady hand, you can avoid drawing the extra lines and leave the white space while painting.
These are just 3 easy painting ideas but you can get creative and add other things to your artwork such as arabesques, calligraphy, floral motives etc.
It’s so beautiful to have so many options. The same Islamic geometric pattern can look totally different using different these painting ideas.
3 Painting Ideas For Geometric Designs
August 7, 2020


Thanks a lot Sandy for sharing some evidences in approaching painting of our drawings in such a structured way.
good pattern, bright colors.
[…] 3 painting ideas for for geometric designs […]