


“To draw directly onto watercolour paper or to transfer a drawing afterwards? This is the question.”
I don’t think Hamlet had this kind of problems, but I’m sure you have.
How many times have you been looking at someone’s design on Instagram and wondered how they managed to draw the pattern without showing the construction lines? Did they erase the lines? Or did they copy the pattern? How?
I was there too.
It’s really easy to transfer a drawing, but just like everything, you have to learn the process first.
At the beginning of my journey, I was all about transferring. I loved the crisp lines of colour onto my watercolour paper. But with time, I started to appreciate the semi-hidden construction you have when you draw directly onto the watercolour paper instead of transferring the pattern.
Many people don’t really understand what stands behind Islamic geometry. The lines, the struggle.
I get far many more WOWS when I show the construction rather than just the final design because the construction itself is a piece of art.
Whether you want to show the lines or not here is how I transfer my patterns.
Credit to Samira Mian for teaching me this many years ago.
TOOLS AND SUPPLIES NEEDED
What you’ll need is:
-
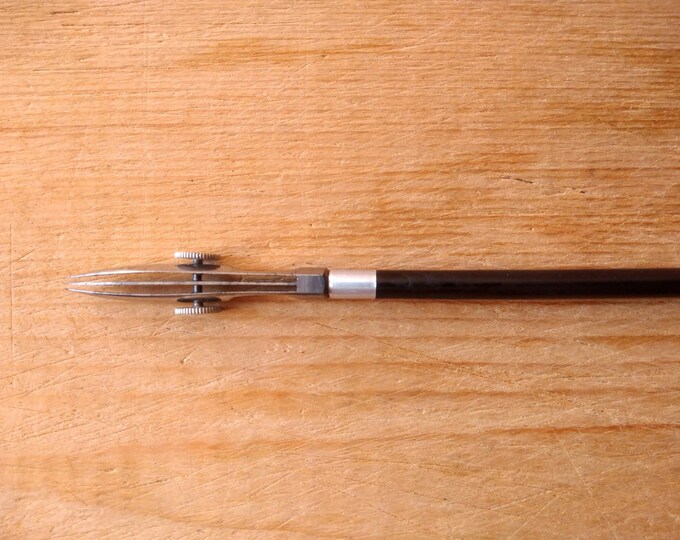
A spoon, a coin, a burnisher, or anything with a round edge
Let me spend a few words on the quality of the paper you draw the geometric construction on.
In the past, I used to draw on copy paper. Please don’t do that.
Copy paper is too thin, and you will make huge holes with your compass’ steel point affecting the accuracy of the design.
Now I use Bristol paper. I know you don’t want to spend more money as it’s surely more expensive than copy paper, but I highly recommend to do that.
1. TRACE THE PATTERN
Once your construction is completed, make sure to outline the design with a fineliner in order to recognize the final pattern between the web of lines.
Put the tracing paper on top and secure it with some masking tape. We don’t want the tracing paper to move, so be sure to tighten it to the paper underneath.
With the use of a pencil draw the final pattern onto the tracing paper.
Many artists suggest to use a soft lead pencil; this means a B or an HB. You can use a soft lead if your pattern is big enough for the smudges to not ruin it. In my case, for example, I use a 2H lead because the design is so small that having smudges on it would ruin the watercolour.
But be aware of this: the softer the lead, the more smudges, the less pressure you put into transferring the design. The harder the lead, the more accurate you are, the more pressure you need for it to be transferred.
Don’t use a harder than 2H lead in any case. Just try yourself and choose what the best option for you is.
2. FLIP IT UPSIDE DOWN
Once your pattern has been traced, carefully take off the masking tape.
Flip the tracing paper upside down (the side with your pattern on should be faced down) and secure it with masking tape onto the watercolour paper.
You surely don’t want the tracing paper to move while transferring the design because this would result in a lot more smudges, bold lines and inaccuracy.
3. RUB RUB RUB
Here comes the “fun”.
Take your spoon, coin or whatever and rub it onto the tracing paper. You can even use your nails. Just be sure to use something round and edgy. By doing so, the carbon of the pencil will be transferred onto the watercolour paper. As I said before, the harder the lead, the more pressure you have to put on it.
When you think you are done – believe me, you are not- take off the tape from one corner and check if the design has been transferred or not.
Do that for every corner but one at a time. This will prevent the tracing paper from moving.
Repeat the rubbing until you are satisfied and when you are done, take off the tracing paper.
And VOILA’!
You are now ready to paint.
OTHER METHODS
There are also other methods that can be used to transfer a drawing onto watercolour paper. I personally haven’t tried them yet but it’s good to know other alternatives.
You can, for example, use yellow graphite paper which is better than black graphite paper or you can use a lightbox if your watercolour paper allows you to see underneath.
If you are a visual learner I’ve also made a video tutorial about tracing and transferring. Check it out here.
***Affiliate disclosure: This blog post contains affiliate links which means that I may earn a small commission – at no extra cost to you. This helps to support my work so that I can continue to make valuable free content for you.***
How to Transfer a Drawing Onto Watercolour Paper
May 28, 2020


Thank you for another interesting post, Sandy.
As a complete beginner I find this Stage most prone to mess up the final work, the softer the pencil the easier to transfer, but so much more mess ♀️ The harder the pencil the more difficult it is to transfer projects especially for tiling. Sometimes I stop before transferring and get stuck there…
Hi,
I have a question about tracing paper. Is there a particular type that you use? If so, could you share the details? When i compare the tracing paper i have with what I see Samira Mian (for instance) use, i find mine a lot thinner and lighter. Are they different types of tracing paper, and which is according to you?
Thank you!
Samira Junaid
Which is best according to you.
(Sorry about that!)
Hey Sandy,
Transferring is the part I least enjoy. When intricate patterns are concerned, they are such a headache. ugh. One time, I tried scanning and simply printing my watercolor sheet but that was such a disaster. The paper is too thick, the ink smudges and when finally I watercolored, the printer ink made the watecolor muddy. So I was back to this tried and tested method.
Before doing transfers, I always take a break and come to the piece fresh in mind. I think it helps me.
Your blogs are such nice reads. Looking forward to them
Thanks Sandy.
I see that some people are using light boxes instead of tracing paper.. Do you use one? What do you see as the advantages and disadvantages. And if you do use one, a short video would be great.
Thanks once again.