


I think that the most frequently asked question I got since I started sharing my free .pdf tutorials out there is “how to use Geogebra”
Oh no, wait, the most frequently asked question is “what do you use for drawing Islamic geometry on the computer?” then comes the “how does GeoGebra work?”
Last week I shared with you the computer programs you can use for drawing. And I wanted to stop there, but something in my mind said “you can’t leave them this way. Don’t be stingy and serve your crowd”. Yeah, I talk to myself in my head. Is that even normal? I don’t know, but I’m such an interesting person I just can’t stop LOL
DISCLAIMER: This is just a blog post and if you want to visually learn how to set up your Geogebra interface and use Geogebra to draw Islamic Geometric patterns, I teach this in my course “Islamic Geometric Patterns: Analyse and Construct a Zellige Pattern”.
Let’s get back to our blog. First of all, Geogebra is free, so don’t be lazy and install it on your computer. There is an online version too, but I think the computer version is far better. I’m using the Classic 5 version.
The user interface looks something like this.

If your interface doesn’t look like this, it might be because you have other windows open.
I have the “Algebra” window where all the object (points, lines, segment, etc.) are listed, and the “Graphics” window where the drawing is shown.
To show or hide a specific window just go to the “View” menu and make your selection.
The “Graphics” windows come with a grid and axes, but you can turn them off or on with a right-click inside the window.

The menu works just like any other menu bar, click on it and see it for yourself.
Under the menu bar there’s the toolbar. Each tool has different options. Click on the little arrow in the bottom right corner of each tool to see them.

The only tool I use here is the arrow to select the objects.
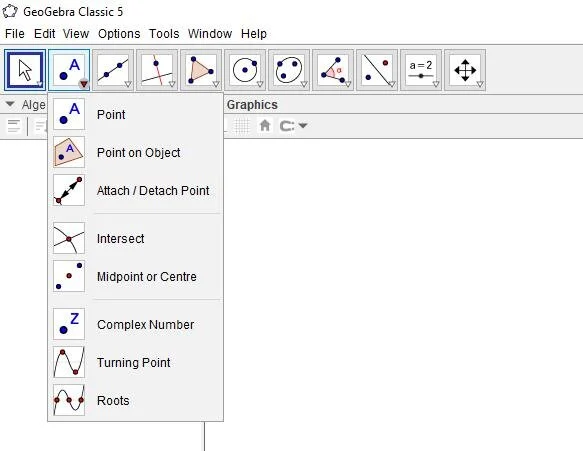
Here I usually use the Point tool to create a point.
Points are created when drawing a segment or line, but sometimes you may want to add some point to make the selection easier.
Just select the Point tool and click on the “Graphics” area to draw a point.

I use both the line and the segment tool.
The difference between the two is that a segment has a start and a finish point while the line is endless.
In both cases, just click on the “Graphics” area or select two points to draw a line or a segment.
I use the Perpendicular Line tool when I want to find the vertical line once I’ve drawn the horizontal line.
To do so, select a point and then select a line to draw the perpendicular line.
Sometimes I use the parallel line as well, especially when it comes to creating the petals. In that case, select a point and then select a line to draw the parallel line.

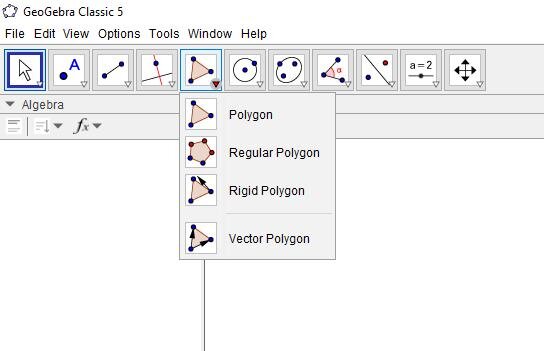
The Polygon tool is used to highlight the shapes once the construction is done.
In this way, it’s easier to change the colour of each shape or a group of shapes.
You just have to select the points starting from the first point to the last one and then select the first point again to create the shape.

These tools help you draw the circle, and you can do it in many ways.
Select the Circle with Centre through Point tool to draw a circle starting from a point.
Just click on that point and then click anywhere on the “Graphics” window to create a circle.
With the Circle: Centre & Radius tool, you select a point and type the radius in the window that appears after that.
The computer will draw a circle with the centre on that point and the radius you typed in. I’ve never used the other tools, but their meaning are pretty much intuitive.

I use the Angle tool to check whether the angles are correct or not.
This is really useful when you study on your own, and you want to check whether the proportions are correct or not.
Select 3 points or 2 lines, and the program will tell you the degree of that angle.
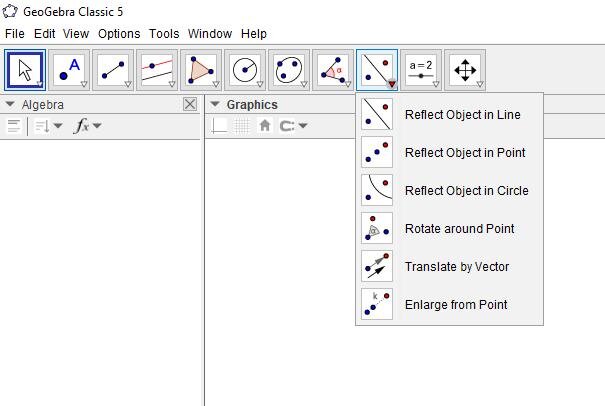
The Reflect Object in Line tool is a lifesaver.
I use it to reflect the shapes so that I don’t have to draw them all.
Select the object you want to reflect and then select the line of reflection.
The program will reflect the shape on the other side of the selected line.
Another useful tool is the Rotate around Point tool which I use to divide a circle into equal parts.
Select the object you want to rotate, then select the centre point and enter the angle of rotation.
For example, if you want to divide a circle into 8 you have to select the horizontal line, then select the centre and type 45° (360°:8= 45°)

You can add text, button, images etc but I’ve never tried these buttons.
I think these fundamental tools speak up for themselves, and you can easily understand what they are used for.


In the “Algebra” window you can choose how to sort the objects in there.
I usually sort them by Object type which groups all the circles together, lines together, point together and so on. Or you can group them by Construction order which is useful as well.
Once you select a tool, just hover the mouse over the tool, and the program will tell you exactly what you have to do with that tool.
Pretty cool right?

That’s it, you guys. Just play around with this powerful program and you should learn how to use Geogebra very easily.
Don’t be afraid to mess up and let me know what you think about it in the comments below.
Learn How to Use Geogebra: the basics
March 11, 2020


Wow!!!
It is really great!!!
Thanks a lot!!!
This looks great Sandy. Thank you so much for sharing this joy! I’m just trying your instructions but have become stuck with the instruction for diving a circle into 8 segments. I’m not sure where I should type in the 45, and can’t see how to get a symbol for degrees. Am I on the right track?
You need to draw a line across the middle of the circle you’re trying to divide. After selecting Rotate about Point click on the line then click on the centre point and the dialog box for the angle size will appear. Input the angle and hit return. Repeat around each new line until the circle is divided into the appropriate number of segments.
Thank so much for this info. I did know about GeoGebra but did not know how to start. Your blogpost isa exactly what I need to get started.
Thanks. Great first step. I hope I find you’ve carried on with it.
Sandy, you saved me. I so want to create some Islamic patterns but I had become so confused looking at possible software. This blog was a tremendous help. Thank you.